Handheld Tachometer PCE-DSX 20-ICA with trigger input, incl. ISO calibration certificate
Portable, stroboscope for the professional in operation / Bright xenon flash /
LED display / External trigger input / Setting via buttons and rotary knob
The handheld tachometer is usually used for speed or vibration measurement or for motion observations. This stroboscope has a small design and is light in weight. This allows the stroboscope to be conveniently used even when measuring in hard-to-reach places. The device is the optimal tool for the practitioner. The flash rate is set via a rotary knob on the stroboscope and displayed on a digital display. Continuous operation is easily possible with the stroboscope. The device also has a trigger input, which allows external triggering or synchronization. The supply voltage is ensured by mains cable. The half or double speed can be selected via the keyboard.
Applications:
This handheld tachometer is the ideal tool for service technicians and maintenance personnel of industrial equipment and machinery. Check the speed, the synchronization or make mistakes visible that you can not see with the naked eye - optically bring processes to a standstill. The stroboscope has been used for many years in many industrial processes, but also in research a. Development proven:
- At bottling plants and labeling machines of breweries and mineral water producers
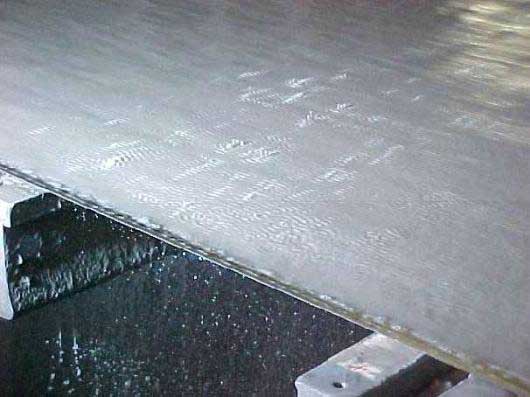
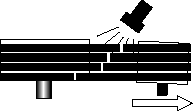
- On paper and printing machines: The stroboscope is used here to detect the register at speeds of more than 60 m / min. One looks at the web before winding with the stroboscope). The stroboscope makes it very easy to visualize even the smallest process errors, such as pulsations. The following picture was taken on the wire of a paper machine. All strips and suckers below the sieve running along these strips worked perfectly, except for one. Of course, this was not visually visible. With the stroboscope, the source of error could be detected by very fine marks on the finished paper:

- On weaving machines in textile factories
- in the automotive industry
- on high-speed machines and motors: The stroboscope is essentially used to determine the speed, as shown in the picture on the right. Often this serves to check or adjust the speed of large high-speed rotors with the data from the process control system or specified on a digital display speed value, which usually comes electrically from the drive. In addition, the shaft shaft is checked for concentricity. Thus, the stroboscope is the optimal tool for inspecting motors, shafts, belts, cylinders ... just what rotates in operation.
- At ventilation systems in the air conditioning industry
- on strip rolling mills in the steel industry
- Wherever rotating parts are used or in high-volume production processes, the stroboscope is the perfect tool.
Note on accident prevention when using the stroboscope: All objects that are brought to a standstill with the stroboscope move at high speed. Therefore always keep a safe distance and do not touch the test object.
General information on stroboscope use:
The adjoining pictures show you how to use the stroboscope correctly to generate correct values or an optimal freeze frame or what cause, behind eg a double speed (instead of 110 rpm it is 220 rpm). Of course, the correct procedure applies generally, even if only the example of a drive and a drive shaft are treated here

When assessing only one belt drive, an optical standstill is easy to achieve (any prominent point can always be found here on which you can adjust the stroboscope).

When looking at several V-belts with the stroboscope, you should, if possible, e.g. during repair or maintenance shutdown of the machine mark a reference line with a chalk perpendicular to the running direction over all belts.
 Example of measurement on a wave
:
With a well or optimally centered shaft with impeller, you always measure the actual speed at optical standstill. However, if the impeller has an axial impact or an imbalance, then you will measure twice the speed with the stroboscope, for example. This fact often leads to misjudgments in local operations.


