

Bilingual Technical Support (EN / ES)
Public Service, Military and First Responder Discount
30 Day Return Policy
2 Year Warranty
Free Standard Shipping (US)
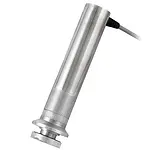
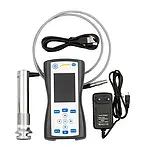
The UCI hardness tester PCE-3500 has been designed for the non-destructive hardness measurement of metallic components. The UCI hardness tester works on the basis of the Ultrasonic Contact Impedance test procedure. This UCI procedure works as follows: a Vickers diamond at the probe is stimulated with its self-resonance. By pushing the probe, the vibration frequency is reduced depending on the hardness of the surface and on the e module of the material and of the contact surface. The hardness of the surface can be determined on the basis of the frequency shift, taking the characteristic curve of the material into consideration.
The UCI hardness tester works non-destructively. There is a microscopically slight pressure against the surface, however, this is normally not visible. Due to the low penetration depth of the Vickers diamond, this UCI hardness tester is especially suitable for edge layer hardened components such as, for example, those that emerge when nitriding or induction hardening. It is typically used for punching tools, presses, thin-walled components, cog wheels, turbine blades, camshafts or weld seams. The UCI hardness tester is also suitable for many other hardness testing applications. It has exchangeable probes with different pressure forces and can therefore cover diverse applications.
After measuring the hardness of a component, the UCI hardness tester PCE-3500 shows different statistical values such as the MAX / MIN values and average values. Moreover, the standard deviation and further coefficients can be determined. A bar chart can be indicated. Since the UCI hardness tester is equipped with an internal memory, the measured data can be evaluated by means of a software.
| Technical specifications on the UCI hardness tester PCE-3500 | ||
| Measurement range | 230 ... 940 HV 20 ... 70 HRC 90 ... 650 HB 370 ... 1740 MPa | |
| Accuracy | +/- 3 % HV +/- 1,5 HRC +/- 3 % HB | |
| Probes | 50 N UCI probe (10 N UCI probe optional) | |
| Hardness scales | HRC, HB, HV, HRB, HL, MPA | |
| Materials | UCI: steel (ferromagnetic) | |
| Reference block | 136 ° Vickers diamond | |
| Measurement direction | 360 ° | |
| Minimum material thickness | 1 mm (with UCI probe only) | |
| Display | graphical colour LCD with backlight | |
| Functions | Single measurement, MIN / MAX / average value, number of measurements, mean value, standard deviation, variation coefficient, bar chart, Smart Mode (filters outliers) | |
| Memory | SD card | |
| Interface | USB | |
| Operating conditions | -20 ... +40 °C; 30 ... 80 % RH | |
| Power supply | 6 V (3 x AA batteries) | |
| Battery life | approx. 10 hours | |
| Dimensions | 160 x 75 x 30 mm | |
| Protection class | IP 54 | |
| Weight | 300 g (without probe) | |