US$ 334.00


Bilingual Technical Support (EN / ES)
Public Service, Military and First Responder Discount
30 Day Return Policy
2 Year Warranty
Free Standard Shipping (US)
| Measurement parameters | Ra, Rz, Rq, Rt |
| Measuring ranges | Ra, Rq: 0.005 ... 16.00 µm / 0.197 ... 629.921 µin Rz, Rt: 0.002 ... 200.0 µm / 0.079 ... 7874.016 µin |
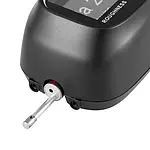
| Radius probe tip | 5 µm/ 196.850 µin |
| Material probe tip | Diamond, 90° angled |
| Max. recommended force for static measurement | 4 mN (0.4 gf) |
| Radius longitudinal guide bar | 45 mm / 1.77" |
| Standards | ANSIB46.1/ASMEB46.1 (DIN EN ISO 4287) |
| Maximum driving distance | 15 mm / 0.59" |
| Measuring principle | Inductive |
| Cut-off wavelength | 0.25 mm / 0.8 mm / 2.5 mm / 0.009" / 0.03" / 0.098" |
| Testing speed | 0.135 mm/s at cut-off wavelength: 0.25 mm 0.5 mm/s at cut-off wavelength: 0.8 mm 1 mm/s at cut-off wavelength: 2.5 mm Reversing speed: 1 mm/s |
| Measuring accuracy | < ± 10% |
| Repeatability | < 6% |
| Display | OLED |
| Units | μm / μinch (switchable) |
| Interface | Micro-USB |
| Power supply | Rechargeable Li-ion battery |
| Dimensions L x W x H | 150 x 60 x 43 mm / 5.9 x 2.36 x 1.69 in |
| Weight | 370 g / < 1 lb |
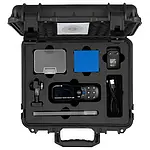
1 x ISO calibration certificate
N.B. calibration certificates are excluded from the right of return as they are customer specific