Bilingual Technical Support (EN / ES)
Public Service, Military and First Responder Discount
30 Day Return Policy
2 Year Warranty
Free Standard Shipping (US)
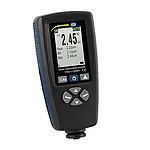
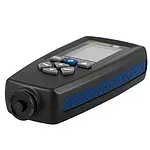
Wall Thickness Meter
Non-destructive coating and dry film thickness (DFT) measuring device for use on ferrous (Type F) and non-ferrous (Type N) metal substrates
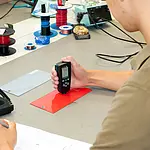
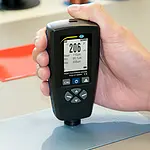
This is a wall thickness meter used for the rapid determination of coating thicknesses on ferrous (Type F) and non-ferrous (Type N) metals. The wall thickness meter or gauge automatically detects the type of metal to be measured. The wall thickness meter uses magnetic induction (ferrous) or eddy current (non-ferrous) to take non-destructive measurements of coating and dry film thickness (DFT) on metal substrates such as steel and aluminum.
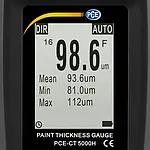
This wall thickness meter is ideal for painted and powder-coated surface testing, automotive paint inspection, coated material testing, and manufacturing quality control applications. Alarm limits can be set in the wall thickness meter to notify the user when a coating is too thick or too thin. If a coating thickness measurement falls outside the established limits, a message appears on the display to alert the user.
| Probe | Type F and Type N |
| Measuring range Type F | 0 ... 5000 μm / 0 ... 5 mm / 0 ... 196 mils |
| Measuring accuracy Type F | ± (2% + 1 μm) |
| Resolution Type F | 0 ... 99.9 μm: 0.1 μm, 100 ... 999 μm: 1 μm > 1000 μm: 0.01 mm |
| Measuring principle Type F | Magnetic induction |
| Smallest thickness of the base material | 0.02 mm |
| Measuring range Type N | 0 ... 3000 μm / 0 ... 3 mm / 0 ... 118 mils |
| Measuring accuracy Type N | ± (2% + 1 μm) |
| Resolution Type N | 0 ... 99.9 μm: 0.1 μm, 100 ... 999 μm: 1 μm > 1000 μm: 0.01 mm |
| Measuring principle Type N | Eddy current |
| Smallest thickness of the base material | 0.05 mm |
| Calibration | One-point to four-point calibration, zero calibration |
| Data storage | Direct measurement (no measurement data storage), four data groups (automatic measurement data storage of up to 2000 measured values) |
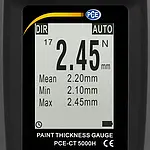
| Statistical functions | Number of measurements, average, minimum, maximum, standard deviation |
| Measurement units | μm, mm, mils |
| Alarm | Alarm limits adjustable, alarm symbol is displayed when limits are exceeded |
| Minimum radius of curvature (convex) | 5 mm / 0.2 in |
| Minimum radius of curvature (concave) | 25 mm / 1 in |
| Smallest measuring surface | Diameter of 20 mm / 0.8 in |
| Maximum measuring rate | 2 x per second |
| Data interface | Data transfer via USB |
| Power supply | 2 x 1.5V AAA batteries |
| Menu languages | German, English, Russian, Chinese |
| Operating conditions | 0 ... 50°C / 32 ... 122°F, 20 ... 90% RH |
| Storage conditions | -10 ... 60°C / 14 ... 140°F |
| Standards | CE ROHS FCC |
| Dimensions | 110 x 53 x 24 mm / 4.33 x 2.09 x 0.95 in |
| Material housing | ABS plastic |
| Weight | 92 g / < 1 lb |
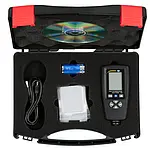
1 x PCE-CT 5000H Wall Thickness Meter
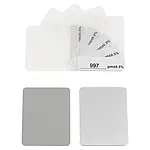
2 x Zero calibration plates (ferrous and non-ferrous)
5 x Calibration plates
2 x 1.5V AAA batteries
1 x USB cable
1 x PC-compatible software
1 x User manual
1 x Carrying case