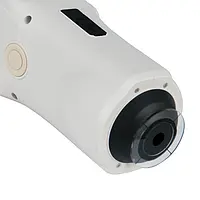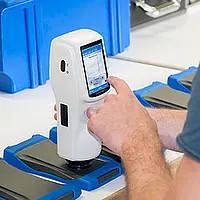


The paint testing equipment was developed for quality control, offers a high accuracy and comes with a 3.5" touch screen display. When using the paint testing equipment, you can choose between different colour spaces (CIE LAB, XYZ, Yxy, LCh, LUV, HunterLAB) and 45/0 optics geometry. After a measurement with the paint testing equipment, the reading can be used as a reference value while other readings can be recorded as a sample and later be compared to the reference value easily.
| Measuring geometry | 45/0 according to CIE No. 15, GB/T3978 |
| Integrating sphere | Ø 58 mm |
| Sensor | Silicon photoelectric diode |
| Wavelength range | 400 ... 700 nm (10 nm pitch) |
| Measuring aperture | Ø 8 mm |
| Colour spaces | CIE LAB, XYZ, Yxy, LCh, LUV, HunterLAB |
| Colour index | ΔE*ab, ΔE*uv, ΔE*94, ΔE*cmc(2:1), ΔE*cmc(1:1), ΔE*00, ΔE(h) |
| Chromacity data | WI (ASTM E31 CIE/ISO, AATCC, Hunter) YI (ASTM D1925, ASTM E313) TI (ASTM E313, CIE/ISO) Metamerism Index Mt colour stain, colour fastness |
| Observation angle | 2° / 10° |
| Light source | D65, A, C, D50, D55, D75, F2, F6, F7, F8, F10, F11, F12 |
| Light source device | combined LED |
| Life of light source | 5 years, > 1.6 million measurements |
| Data on display | Spectral value/graph colorimetric value color difference (value/graph) PASS/FAIL result colour offset colour simulation |
| Min. time between 2 measurements | 1.5 seconds |
| Repeatability | Standard deviation within ΔE*ab 0.04 Average of 30 measurements of standard white plate |
| Error between equipment | ΔE*ab 0.2 |
| Display | 3.5" TFT touch screen |
| Interface | USB / RS232 |
| Storage | 1,000 reference values, 15,000 samples |
| Power supply | Rechargeable lithium-ion battery |
| Operating conditions | 0 ... +40 °C / 32 ... 104°F 0 ... 85 % RH |
| Storage conditions | -20 ... +50 °C / -4 ... 122 °F |
| Dimensions | 90 x 77 x 230 mm / 3.5 x 3.03 x 9.05 in |
| Weight | 600 g / 21.1 oz |