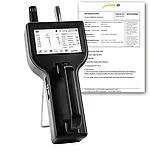

Measurement of particle sizes up to 25 μm / up to 6 parallel measuring channels /
internal memory / reporting according to standard 14644-1, EU GMP Annex I, FS 209E /
extrapolation of the mass concentration in μg / m³ / Ethernet, USB or (optional) WIFI connection
With the help of a particle counter calibrated in compliance with ISO 21501-4, the size and number of particles in gases can be determined. 
In order to be able to reliably determine the relationship between the signal strength at the detector and the particle size, particle measuring devices for demanding applications, such as e.g. classification of the clean rooms calibrated in compliance with the standard 14644-1 according to the specifications ISO 21501-4. ISO 21501-4 is an internationally established standard for ensuring the measurement accuracy and comparability of the measurement results of different particle counters.
ISO 21501-4 is one of 4 sections of the ISO standard for particle size distribution. The main goal of introducing the new version in 2007 was to improve the accuracy of the measurements and exclude, or at least significantly eliminate the differences occurring in the result of measurements by different devices.
ISO 21501-4 uses several parameters, the comparison of which provides meaningful results. 
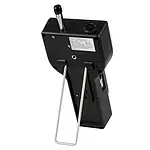
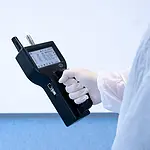
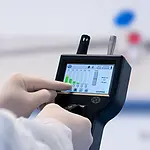
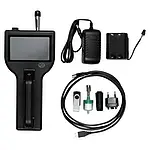
The PCE - PQC series particle counters from PCE Instruments meet all the above-mentioned requirements for the calibration in compliance with ISO 21501-4. The devices are operated via a 4.3" colour touch display. The measurement data can be stored in a large memory, evaluated by means of the software and, for example, presented in the form of ISO14644-1 or EU GMP reporting format. The measuring devices can detect different particle sizes in the range between 0.3 ... 25 μm and determine the mass concentration. The handheld and table measuring devices are equipped with an internal vacuum pump with an automatic flow rate control. The remote particle collectors are connected to an external source.
Fine dust originates in the natural sources such as forest fires, volcanic eruptions, sea salt, whirled sand, plants or even microorganisms. Nowadays, due to the increasing industrialization, humans also contribute a lot to locally significantly increased particulate matter emissions. Through traffic, energy production, agriculture and industry, the fine dust levels are increasing immensely. No matter whether the origin is natural or man-made, in various areas an increased particle concentration or the presence of the particles is undesirable and harmful.
Fine dust gauges calibrated in compliance with ISO 21501-4 are suitable for numerous applications in the field of clean room technology, such as the monitoring of clean workbenches or clean rooms, clean room qualification or filter control and monitoring in the area of supply air and exhaust air systems. Also, in the field of environmental metrology, building renovation or industrial manufacturing of electronic components as well as in the area of the pharmaceutical industry, ISO 21501-4 calibrated particle counters guarantee product quality and process reliability.
| Measuring range | 0.3 ... 25 μm |
| Measuring channel sizes | Factory calibrated at 0.3, 0.5, 1.0, 2.5, 5.0, 10.0 μm |
| Counting efficiency | 50% at 0.3 μm 100% at > 0.45 μm according to JIS |
| Flow | 2.83 l / min (0.1 ft3 / min) |
| Random loss | 5% at 4,000,000 particles / ft³ |
| Battery | 10 h |
| Light source | Long-life laser diode |
| Zero count | < 1 count / 5 min (< 2 particles / ft³) |
| According to ISO 21501-4 and JIS | |
| Counting modes | Automatic, manual, real-time, cumulative / |
| Differential, mass concentration | |
| Alarms | 1 ... 9999999 counts, adjustable |
| Calibration | Traceable to NIST |
| Display | 4.3" WQVGA color touch display, 480x272 px |
| Printer | External thermal printer |
| Aspiration | Internal pump with automatic |
| Flow control | |
| Air outlet | Internal HEPA filter |
| Battery pack | Replaceable Li-Ion battery |
| Charging time | About 4 hours |
| Reports | ISO 14644-1 |
| EU GMP Annex 1 | |
| FS 209E | |
| Configuration | Memory for 50 custom configurations |
| Standards | ISO 21501-4 and JIS B9921 |
| Dimensions | 25.4 x 12.9 x 11.4 cm |
| Weight | 1.0 kg |
| Storage | 45000 data sets (ring memory) consisting of |
| Particle count, temp and humidity, locations and times | |
| Sample locations | Up to 1000 locations can be stored |
| Samples duration | 1 s ... 99 h adjustable |
| Power supply | 110 ... 240V AC 50/60 Hz |
| Operating conditions | 5 ... 40°C / 41 ... 104°F |
| Up to 95% RH not condensing | |
| Storage conditions | 0 ... 50°C / 32 ... 122°F |
| Up to 98% RH not condensing | |
| Temp.-/ Humidity sensor | 0 ... +50 °C (32 ... +122 °F), 15 ... 90 % r.H. |
| Internal | |
| Resolution | 0.5 °C |
| Accuracy | ±0.5 °C (±1 °F), ±2 % r.H. |
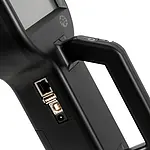
| Interface | Ethernet, USB |
| Optional interfaces | WiFi 802.11 b/g, RS485 or RS232 |
| Number of measuring channels | 6 |