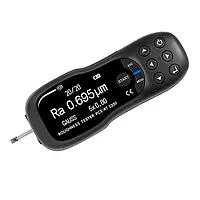
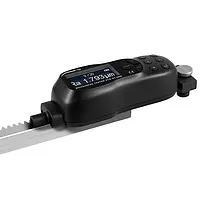

Portable roughness meter for fast detection of Ra, Rz, Rq and Rt /
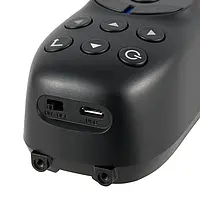
Large OLED display / Micro-USB interface / With calibration plate and roughness standard
/ Measuring software / Permanently installed li-ion battery
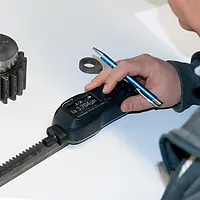
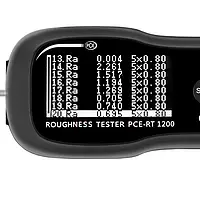
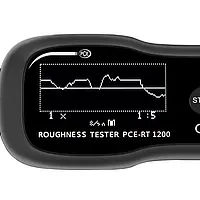
The handheld roughness tester is used to determine the surface roughness. The compact surface handheld roughness meter is a handheld device for mobile use. Due to the power supply via a powerful battery, it can be used directly on site. This handheld surface roughness meter is used in the laboratory, production and generally wherever the roughness of the surfaces is to be determined. The measured values are displayed on the very clear OLED display directly on the meter. In addition, the handheld roughness meter has a storage option for up to 20 measured values, which can later be read out via the micro USB an interface. For this purpose, the measurement software can be used, which, as well as the USB cable, is in the delivery. The built-in rechargeable battery is also charged via the micro USB interface. The already mentioned measurement software is particularly suitable if some series of measurements are available. The data is then transferred to the software and can be evaluated directly on the screen.
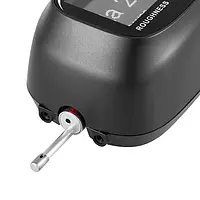
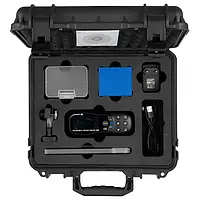
The handheld roughness meter has a protective cap for the sensor, which protects it from external influences and can be easily screwed to the device. A calibration plate with roughness standard also belongs to the standard equipment and serves to check the correctness of the measurement results. In addition there is a very special detail: This instrument works very smooth, with low measurement noise and has a very high reproducibility thanks the “Swiss Made” high precision roughness test mechanism built in the handheld roughness meter by PCE Instruments.
During the roughness measurement, different technologies and surface roughness measuring devices for determining the roughness are used. There is a big difference between contact and non-contact methods, whereby within these two distinguishing features, in the practice, some more different approaches for determining the surface roughness parameters are used.
It follows that the probe tip itself is an important parameter in the determination of the roughness parameters. Depending on the selected tip angle and probe tip radius of the diamond, the handheld roughness meter can depict the surface profile more or less accurately. At a large angle and with a large radius, the diamond tip only detects the coarser recesses, grooves and hollows; the sharper the angle and the smaller the radius, the deeper the diamond can penetrate into the profile unevenness and produce an exact image of the surface profile. Here, however, it is important to evaluate and consider when choosing a suitable measuring device. A handheld roughness meter with a pointed diamond and a small radius is much more susceptible to wear and brittle fracture than a handheld roughness meter with a blunter geometry. For regular surface inspection, the handheld roughness meter from PCE Instruments, with a point angle of 90 ° and a tip radius of 5 μm, represents a very good compromise between robust, low-wear durability and precise roughness index determination according to accuracy class 2. A calibration according to DIN ISO 5436 is therefore easily possible for the surface handheld roughness meter.
Rz = average roughness
The average roughness Rz is the arithmetic mean of the largest single roughness depths of several adjacent individual measuring sections.
Ra = arithmetic centers roughness
Ra is the generally recognized and internationally applied roughness parameter. It is the arithmetic mean of the absolute values of the profile deviations within the reference line. The measured value Ra is always smaller than the Rz value determined on the same roughness profile.
| Measurement parameters | Ra, Rz, Rq, Rt |
| Measuring ranges | Ra, Rq: 0.005 ... 16.00 µm / 0.197 ... 629.921 µin Rz, Rt: 0.002 ... 200.0 µm / 0.079 ... 7874.016 µin |
| Radius probe tip | 5 µm/ 196.850 µin |
| Material probe tip | Diamond, 90° angled |
| Max. recommended force for static measurement | 4 mN (0.4 gf) |
| Radius longitudinal guide bar | 45 mm / 1.77" |
| Standards | ANSIB46.1/ASMEB46.1 (DIN EN ISO 4287) |
| Maximum driving distance | 15 mm / 0.59" |
| Measuring principle | Inductive |
| Cut-off wavelength | 0.25 mm / 0.8 mm / 2.5 mm / 0.009" / 0.03" / 0.098" |
| Testing speed | 0.135 mm/s at cut-off wavelength: 0.25 mm 0.5 mm/s at cut-off wavelength: 0.8 mm 1 mm/s at cut-off wavelength: 2.5 mm Reversing speed: 1 mm/s |
| Measuring accuracy | < ± 10% |
| Repeatability | < 6% |
| Display | OLED |
| Units | μm / μinch (switchable) |
| Interface | Micro-USB |
| Power supply | Rechargeable Li-ion battery |
| Dimensions L x W x H | 150 x 60 x 43 mm / 5.9 x 2.36 x 1.69 in |
| Weight | 370 g / < 1 lb |